A new season begins with this week’s Arena. We’re stacking decks for fun and profit. It’s time for the Production Pipeline!
The season-long stars challenge is back this month. 25 stars earns you an Emperor’s Dreadnaught foil, 50 stars earns you an Emperor’s Dreadnaught avatar. You’ll earn an Imperial Fighter just for playing all five weeks. These seasonal awards are usually given at the end of the season, which is November 5th at 8am UTC.
Format Rules and Technical Notes
The Production Pipeline scenario rule gives smart players the chance to shine.
When an acquired card would go into a player’s discard pile, put it on the bottom of that player’s deck instead.
We’re playing with the Core Set starter and Crisis: Heroes. Trade decks begin just 92 cards this week, meaning the rare cards are more-likely to appear than in most Arena modes.
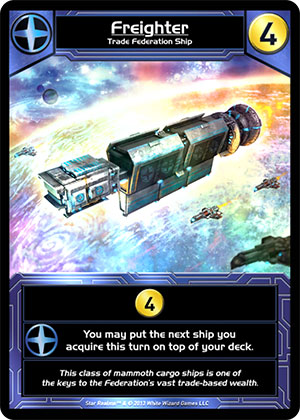
Technical Notes: The scenario rule is pretty clear, but I checked it to be sure: cards that are acquired to the top of the deck (via Freighter or Blob Carrier) do indeed go to the top of the deck. The Heroes go directly into play, as normal. No strange interactions this week.

The first two turns are unlike any games of Star Realms you’ve ever played.
Star Realms is a game of tradeoffs. Buying cards that produce trade is usually a good way to begin the game, as you want to build up enough resources to acquire expensive cards later. But, those expensive cards may not appear on the trade row. What then? This week, your trade-versus-utility-versus-damage calculations can be very direct, as whatever you buy on turn one and turn two is guaranteed to be in your hand for turn three. If there is an expensive card on the trade row, you can stack the bottom of your deck with trade cards (across factions, if necessary) and be certain to grab it when the time is right…
…if you are player one. The first player will take their third turn before their opponent. This means that they control the tempo. They get the first shot at buying the best thing on the trade row on turn three, and this is always true. Even if there are no trade-generating cards on the trade row to begin the game, the first player can buy one Explorer on turn one, and two more on turn two, to guarantee at least 6 trade on turn three every time. (This is true even if they can’t buy three Explorers due to both Vipers appearing in the same hand. In that instance, the last two cards of their deck must be Scouts so pairing them with the two Explorers you can buy still guarantees 6 trade.) Usually, seven trade is a safe bet for player one’s third turn.
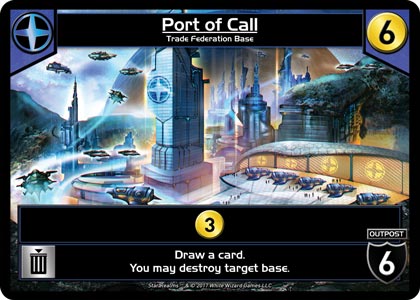
What can player two do about this? They need to plan ahead. Player two needs to predict what player one is likely to buy on their third turn, and set up to answer that beginning with the very first card they purchase. If there is a great base on the trade row (hello, Port of Call), player two might consider buying big damage early, even if this inhibits their mid-game resources. An unanswered base — one that will appear very quickly — can spell disaster for the unprepared opponent.
The best way to stack your deck is to think about “squares.”
Several of Star Realms’ top players refer to “squaring” a deck as having a deck size that is a multiple of five, such that you never shuffle a new deck while drawing a new hand of cards. The ideal version of this strategy is that your deck is a multiple of five, plus one for each card draw effect in your deck. That can certainly be tricky with draw effects on ally abilities, but you get the idea. The main benefit of having a square deck is that nothing will “bottom deck” or “miss the shuffle.” As someone who seemingly has half of their deck-scrapping cards show up just as I am shuffling a new deck, this tactic seems like a great way to improve my game!
This week, squaring your deck is easier than ever. You literally can shape your purchases to ensure that you won’t shuffle your deck at the wrong time. You can also do the reverse – intentionally not squaring your deck to ensure a shuffle does happen. Knowing which route to take requires an awareness of the overall game state. Are you leading? Can you build to a strong combo? Is your best card in your discard pile? And so on.
Having a square deck is essential if you are looking to purchase deck-scrapping cards from the Machine Cult. If your deck is not square, you are going to draw your scrappers right when you shuffle, forcing you to scrap from your hand and possibly not being able to scrap a starting card at all. When I first encountered the format, I believed the scrapping cards were significantly weaker than normal this week. I’ve since learned this trick and now I consider them to be just as great as they always have been — it just takes a bit more work than usual.
One Big Turn appears to be the primary winning strategy this week, but there are other options.
Because you have the ability to literally stack (the bottom of) your deck, you can ensure that key ally abilities will trigger. You can ensure that you’ll have a bunch of trade bunched together on turn 3, and a bunch of damage bunched together on turn 8. You can eventually set your deck up to have huge combo turns to close out the game. For this reason, trade is worth more than normal, because you will be buying relevant cards all the way until the very last turn of the game. (Buying a great card, then triggering or playing a draw-card effect, is as great as it sounds.)
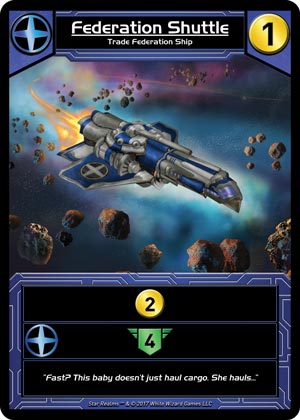
I’ve won a few different ways, but my favorite route is stall-and-scrap. Buying as many Trade Federation cards that grant authority, and the deck-scrapping cards from the Machine Cult, I can drag the game out past turn 25. Most people are neither prepared for this nor are they able to respond once they figure it out. Federation Shuttle has finally found a format where it can shine! One trade for 4 authority, and it bridges into something even bigger! Seriously, most of the best authority-gain abilities in the game are via ally triggers, and the Federation Shuttle (being a common that only costs 1 trade) has proven its worth again and again.
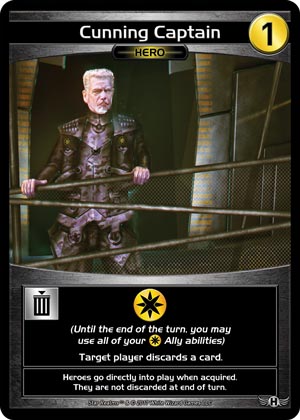
Lockdown – making your opponent discard most or all of their hand – is possible this week but it isn’t easy. Crisis: Heroes only adds one card to the mix for this plan, but it’s great. Cunning Captain should be purchased on sight, and should be saved until the late stages of the game. Forcing your opponent to discard one card isn’t that great, but making them discard a fourth or even a fifth card is game-winning.
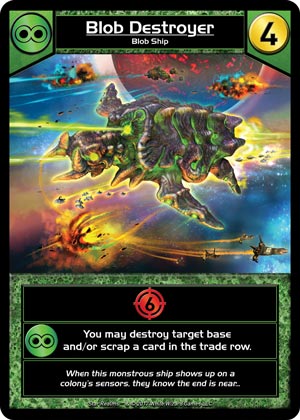
The strongest ally abilities in the core set belong to the Blob. They get “destroy target base” on the four-cost Blob Destroyer’s ally ability. They also get to acquire cards for free and draw even more cards. While I favor the tricky approach via the Trade Federation and the Machine Cult, no one can match the Blob’s brute force strength. One of the reasons I adopted my strategy was to counter the Blob, as the Trade Federation can survive without bases. But if those options are not available, grab the Blob before your opponent can.
In Conclusion
The season begins anew this week, and it kicks it off in style. The game is new in ways we’ve never experienced before, and those who can plan ahead are likely to do very well. I am 9-6 so far in my three runs, and I am sticking with it. This week’s foil looks fantastic. (Something I’ve been saying a good amount lately.)
Good luck in this week’s Arena!
Recent Comments